Sunday, June 16, 2013
Saturday, June 8, 2013
first sounds...
A reprise of the two photos which together, best convey what the final result looks like:
I made a video, me playing the pedalboard (just the LHS section: this will be a common configuration for me), along with my little zither.
http://youtu.be/jK5UKCgQcJg
(Fortunately, I have found another format which seems to preserve the audio quality (such as it is, coming from the camera's built-in 8kHz mic) better than my first video in this blog. Hopefully, even after the additional downstream youtube processing, it'll still be acoustically legible.)
Friday, June 7, 2013
wired for sound
So since the last time, I have basically brought this project to completion. At least, enough completion that I can play music on it, which is the chief goal. A few more details such as hinges and some touch-up painting, remain. But now I can plug it into my solder2midi system, step on pedals, and hear sound.
First, a top view of LHS, to match the RHS view in the last post.
More pics of the springs, which is where work left off in the last post.
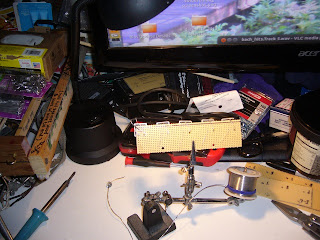
Now for the circuit boards. The cannibalized computer keyswitches are mounted on Radio Shack perfboard, along with a diode in series with each switch. Here, you can see the little clip I made to hold the switches in place while I solder them:
Here are all the boards, with switches and diodes mounted. I arranged it so the rest of the wiring can be done from the back, with the boards mounted in the units.
I keep the plastic keycaps in place on the switches, even though they are not all of uniform shape. They make a much easier target to hit with my simple spring actuators, which themselves can be bent to accomodate the shape of each keycap. (More custom-bending of wires, but oh well.)
The LHS unit has two D-25 jacks, "solder2midi out" and "solder2midi thru", as it were (actually, the jacks are in complete parallel, but one is M and one is F). These mount on plywood panels. The RHS has a loose D-25 cable end, which plugs into the "thru" jack on LHS.
Here's wiring up LHS. Lots of Radio Shack solid-core 4-conductor phone cable.
Here's LHS with cables wire-tied in place, and switch actuator springs being glued. Hopefully the glue will keep the springs from working loose, now that they are screwed into place and bent to the right shapes.
Making the actuator springs for RHS. I used 16-guage steel wire for this (as opposed to the main springs which are 12-guage).
And finally, here's RHS wired-up and plugged into LHS. A quick test reveals all 32 notes working (and the right notes!). Time to play with it...
I'm already planning my next musical project, a "dulce-melos" composed of my existing 15-note zither, plus a keyboard which I'll build (a test-bed for a larger dulce-melos afterwards). But that's a different story.
Subscribe to:
Comments (Atom)


