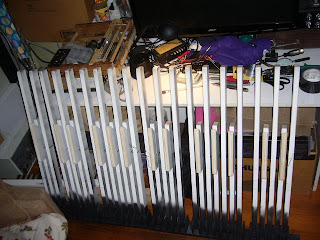
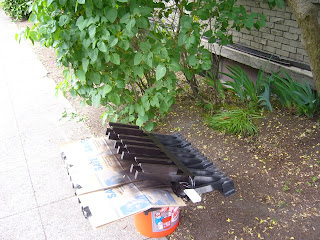
Many steps of painting in the past two weeks, mostly with 24-hour delays in between for the slow-drying gloss paints to cure.
So this phase started like this, with just the pivot rail painted in flat black and the white primer still visible on the keylevers, except where they have been sanded:
My experiments with home-brewed black dye have been a complete failure so far. But to at least make some effort towards longevity (i.e., so that the black doesn't wear through to bare wood), I soaked flat black spraypaint into the sanded tops of the sharps, with a paintbrush, before doing the gloss overcoats.
Here's trussing up the sections to paint the sharps with gloss black:
And then the naturals. I thought something other than blazing white would be good for the naturals. In fact, after I start to see how it all looks, I think a reversed colour scheme (dark naturals, light sharps) would probably have been better -- as opposed to manual keyboards (harpsichord, organ), where I have reluctantly conceded that, even though the reverse colour style looks so much more exciting and exotic and "non-piano", actually light naturals and dark sharps are better, from a visibility standpoint. So, like many reverse-colour keyboards, I add some (metallic gold) highlights, which are mostly for looks, but maybe also improve visibility.
Here are the pieces of the nameplate. It's only called the nameplate because of its functional position, by analogy with harpsichords. And originally it was going to be mounted vertically, in such a way that the sharps would have obscured any writing. But then I decided to go with horizontal mounting, so it will be facing straight up in playing position. And as long as I'm at it with the gold paint, I decided to try a lettering technique I thought of, which I might use for the future clavichord and harpsichord.
First, several coats of metallic gold.
(And here again is my basement-hallway drying rack: with good airflow to the outdoors, which is quite necessary with this chemical-warfare grade gloss paint.)
Then I cover the face with clear packing tape. I used two layers, but I think one would work as well or better, especially given the clearcoat sealing technique. I draw the design with Sharpie; I used rough measurements to space the letters correctly, but the outlines are freehand because I want a slightly disheveled and individualistic look. This technique would also be amenable to outlines produced on laser printer.
For a good several hours, I labouriously went around the outline of each character with this sharp little screwdriver, using it as a punch to poke through the plastic tape and indent the wood. Not only did this tend to seal the edges of the tape a little better against the coming deluge of paint (but this wouldn't have been enough), it also made a very nice looking mark in the wood in its own right. I figured, even if my fancy tape-masking procedures came to nought, I could just paint it solid black and then fill in the letters by hand with gold paint, using a small brush. Getting the tape to remain in place over sharp acute angles required some learned finesse: approach the corner from each side, leaving the very tip connected until last (or else cutting the second side pulls the plastic off-center from the already-cut first side, like a cover-thief in bed).
Peel away tape from the negative space regions, leaving only letters covered.
Here's the finished design, letters covered with tape.
The key step, my bright idea to make this technique actually work, is to seal the taped letters with a coat of clearcoat, before the black. Probably gold paint would have worked for this step, too. The idea is to prevent the black paint from wicking under the edges of the tape, especially on all the delicate sharp corners.
Then (24 hours later), black gloss, a couple coats.
Then, ta-da! The experiment worked, the paint didn't dissolve the tape or whatnot, with some care it is not too hard to peel it off.
Then, another layer of clearcoat to seal everything.
I'm glad I managed to schedule a lot of this painting while it's been sunny and dry in Seattle. This week, it's going to be rainy again, they're saying. After all this stuff dries thoroughly (probably another 48 hours or so), I'll be ready to start fitting the pieces together. There will be some vertical members to fabricate and paint, and boards underneath to provide feet in the right places. And I'll have to finalize the design of the springs and fabricate 32 of them, hopefully consistently. Then, the question of how to hinge the two sections together. I want to find the type of hinge that allows you to lift upward and separate the two parts completely. And, of course, the wiring. Very simple, but I'll have to figure out where and how to mount the D-25 connectors and such. Work continues...


No comments:
Post a Comment